
Spring 2020 One Room Challenge kicks off this week and I’m here for it! Literally. More than just a spectator this time around.

Click the logo to checkout the other guest posts!
Back in 2018, my family and I bought a small piece of land and started building, what is today, our little dream home in Northern Virginia. After spending over a year immersed in design decisions and project plans, I decided to share our home with the hope that you will find some practical inspiration for your own dream home. The new home - old soul mindset is focused on mixing the new with the sentimental to make a modern space feel like home.
When we moved in, I decorated my workspace with pieces I had previously used in a brick and mortar studio in NC (Hey-yo, Jewelry Maker Side Hustle). It worked for almost a year but when I decided to grow an interiors company, I knew I wanted to create a new, fresh, functional home workspace.

STUDIO BEFORE - LEFT WALL

STUDIO BEFORE - RIGHT WALL
I donated what I no longer needed and packed up the rest for a short stay in the basement and attic. The room is now a blank slate (except for the most lovely pendant light fixture) and is ready for a refresh.
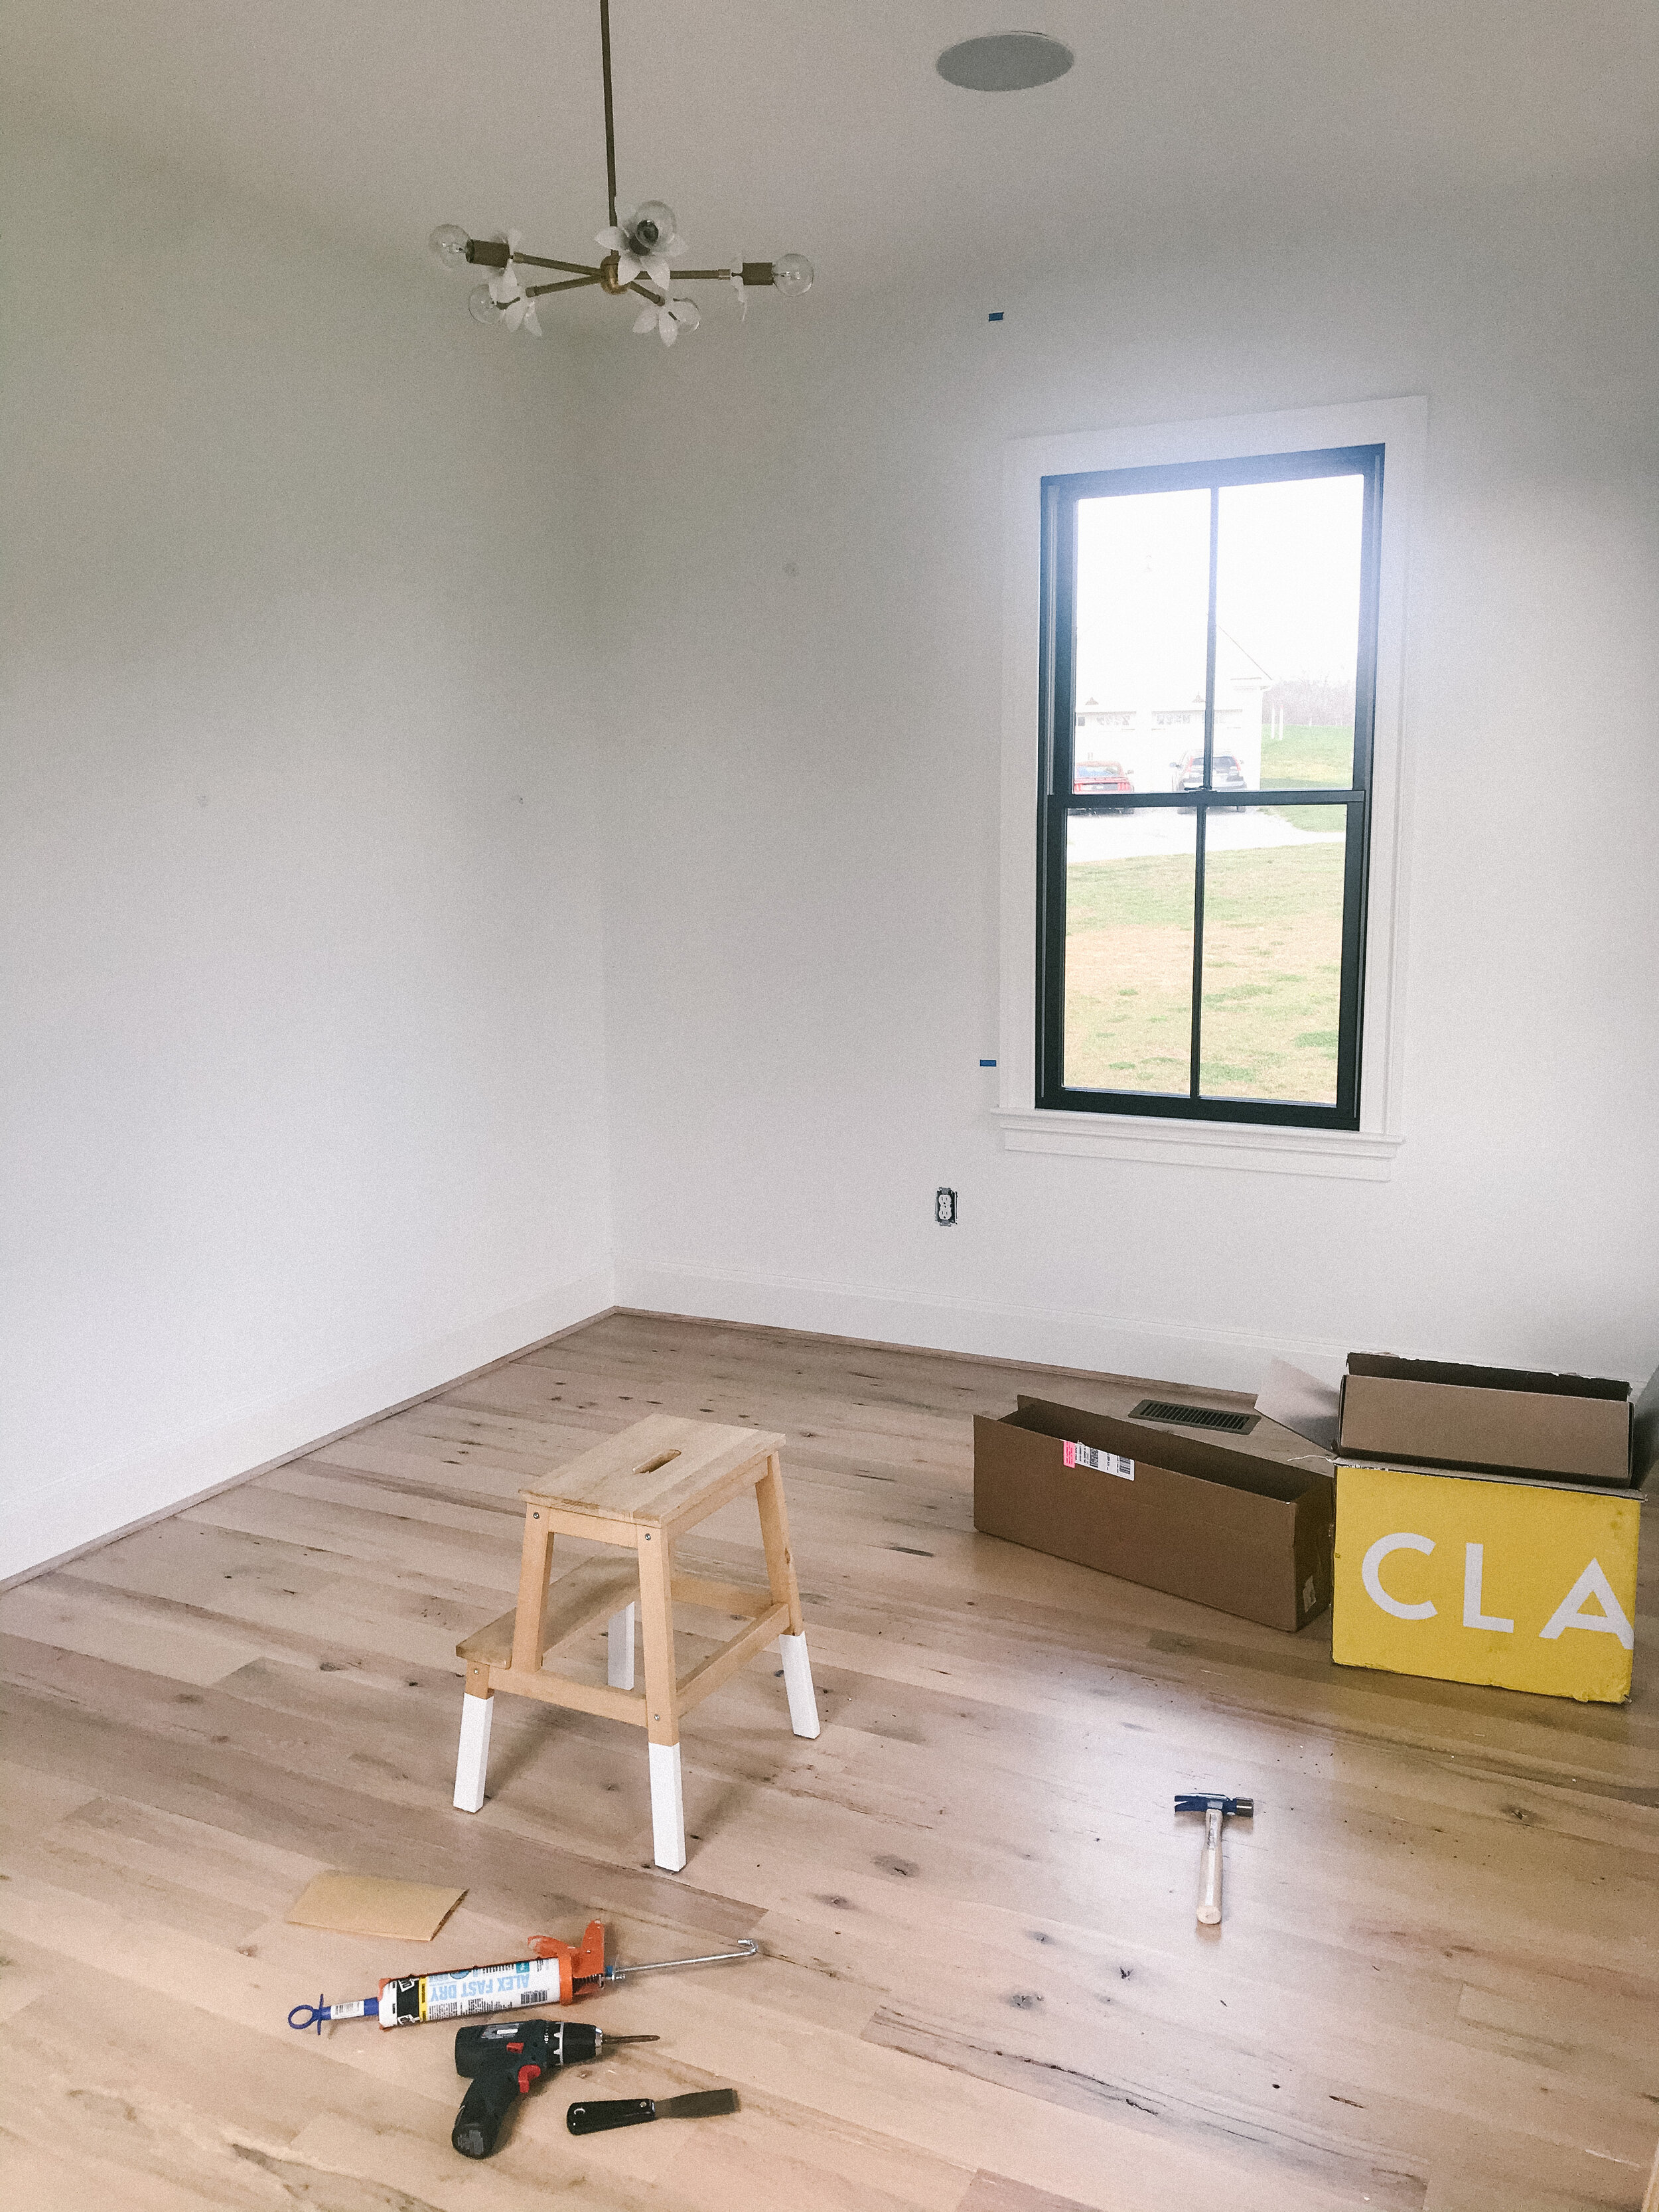
EMPTY STUDIO - FRONT WALL
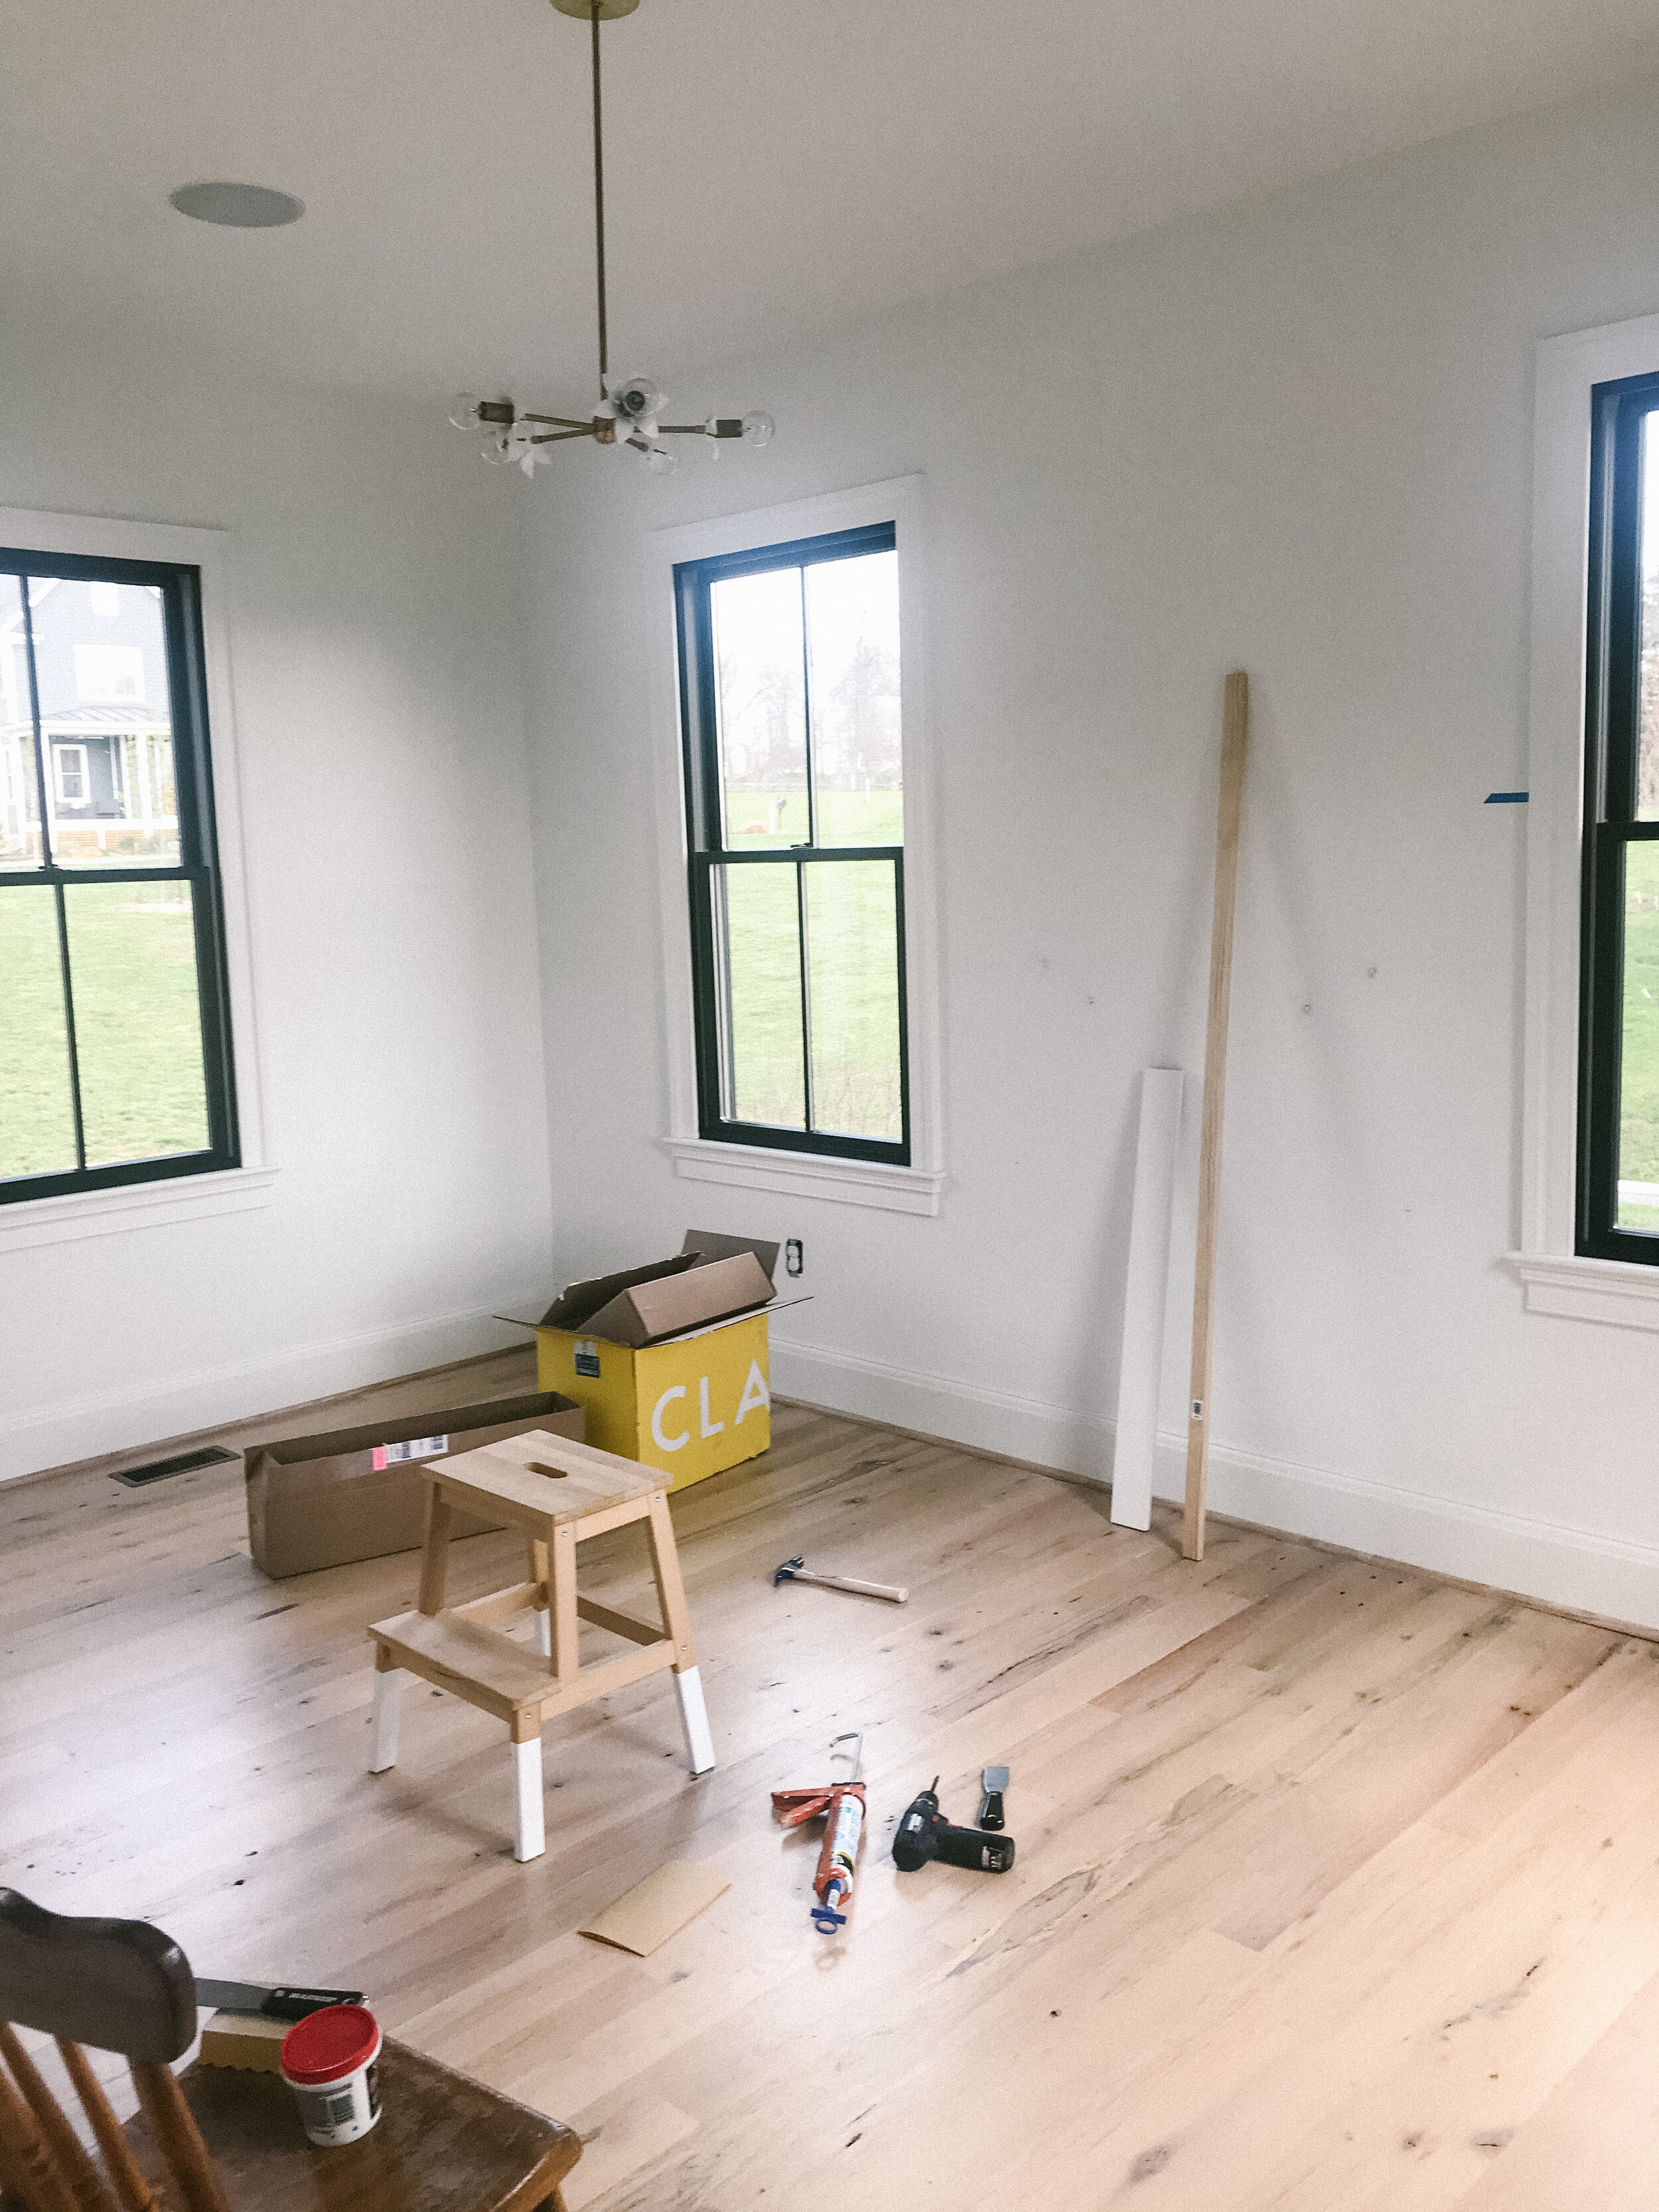
EMPTY STUDIO - RIGHT WALL
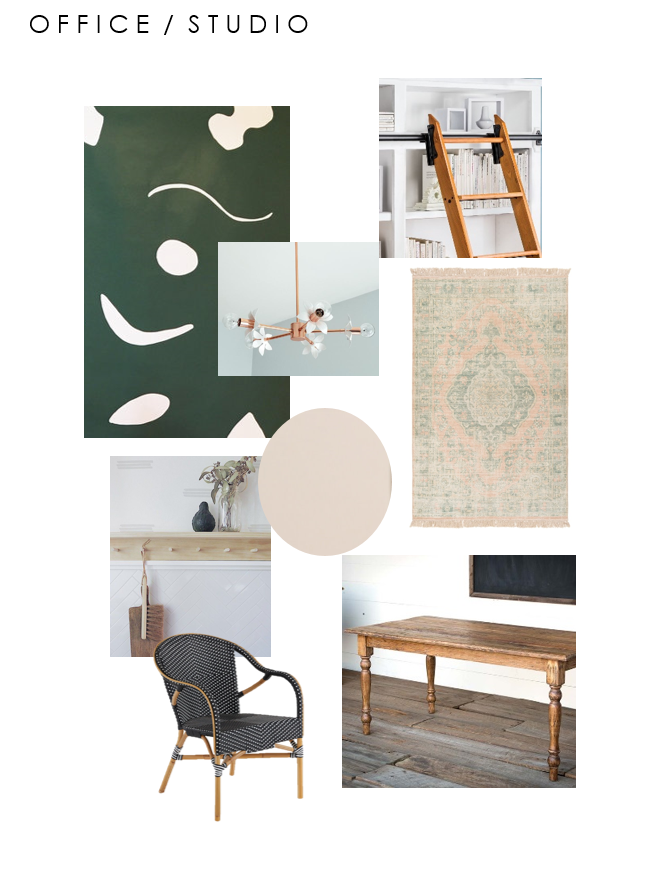
The mood for this room is feminine and bold - vintage pieces mixed with modern color/pattern. Our black framed windows and antique oak floors are the strong bones needed to support this eclectic color palette of soft peachy pink and dark inky green.
Over the next 7-ish weeks, I (and the hubs) will be adding decorative trim, photo ledges, peachy pink wall and trim paint, bold wallpaper, built-in bookcases and storage, a rolling ladder, and sentimental decor items (ex. family heirloom dining room table which will end up being my worktable).
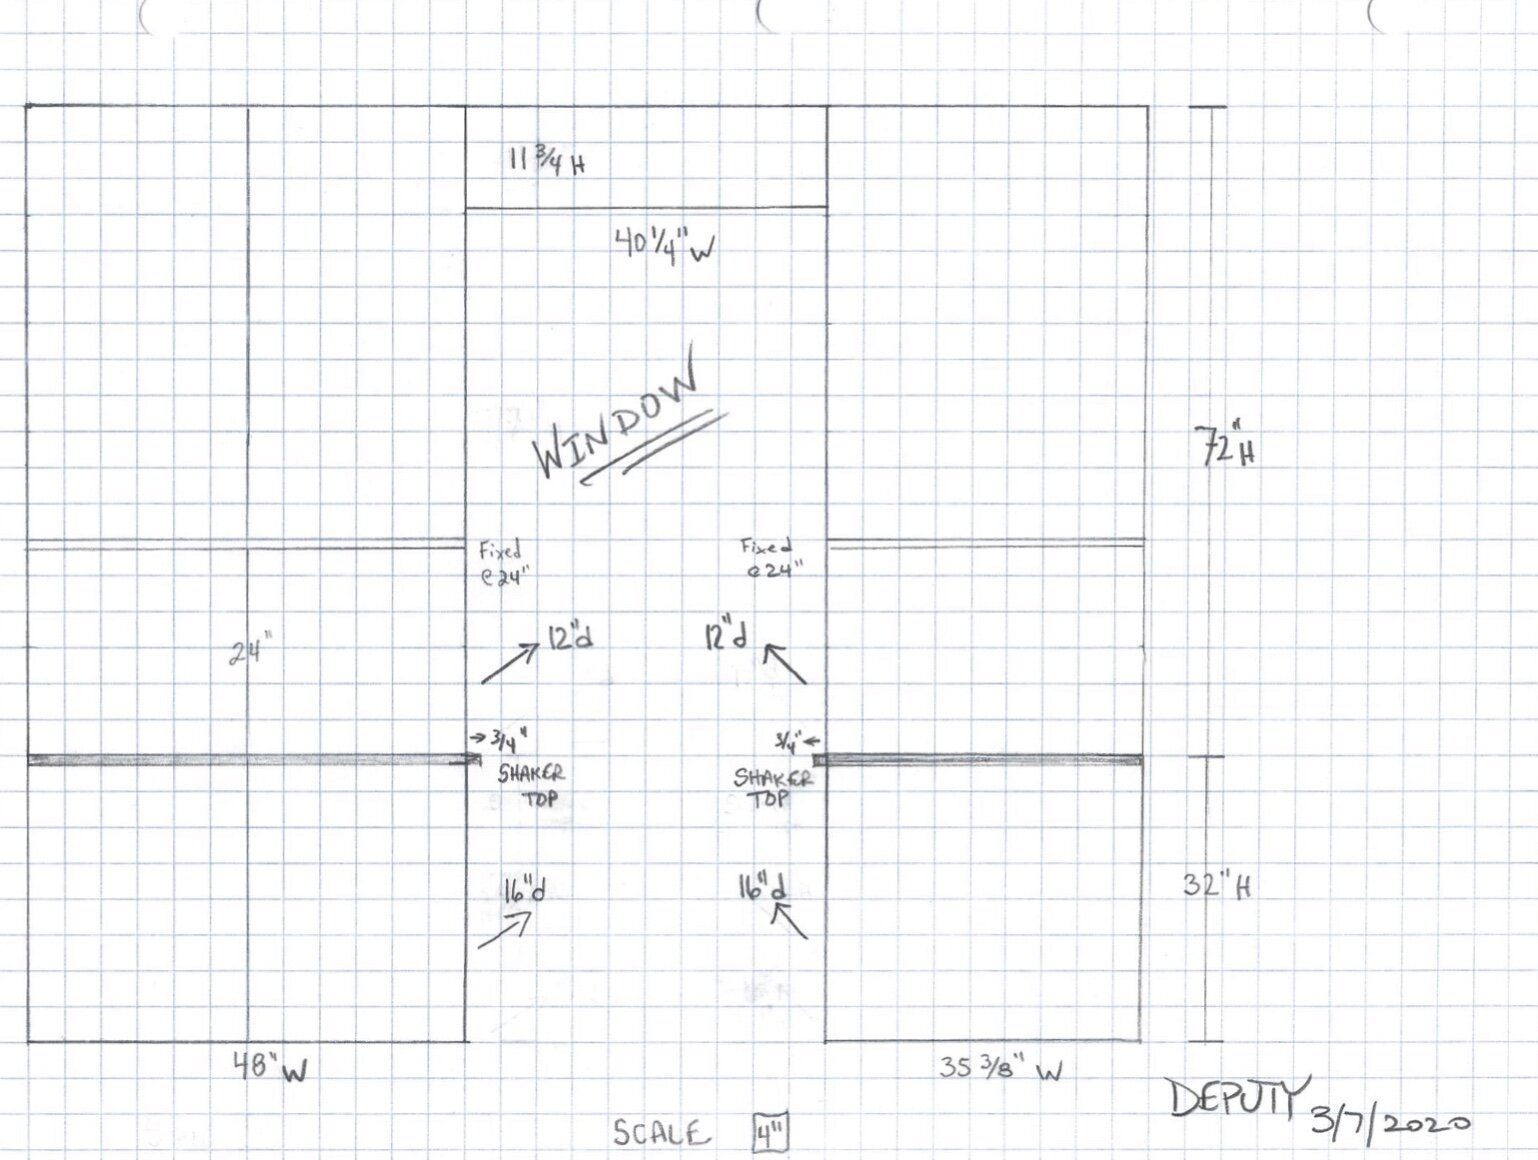
My office/studio space is approx. 170 square feet and three of the walls have large windows…so great natural light! We are adding built-in cabinetry around the front wall, around the window, to give the space some much needed storage. We are currently waiting to hear if the individual cabinetry units we ordered will be here in time to complete the project (construction was shutdown in PA due to Covid) so fingers crossed we can get it done!

A thing you should know about me…I love the color green. I’ve used various shades throughout our home and the office will include the darkest shade yet with a bold, graphic inky green that will make a really cool pair with our mudroom wallpaper.
Now that you know that, let’s patch some holes from a really big shelf!


After patching and sanding, the hubs got to work on removing the baseboard molding on the wall where we will add the built-in shelving...


…and started building the decorative trim and picture ledges. There are so many ways to get creative by adding trim and ledges to your walls. From a design standpoint (on this project), the molding will visually separate the painted portion of the walls from the wallpapered portion.


On the right wall, we used two 1 in. x 4 in. pine boards and a 1 in. x 2 in. board to create a picture ledge between the two windows. And on the back wall, we added wooden pegs to a trim board to create a wall of hooks for hanging fabric, textile, paint samples.

On the left wall, we used the brad nailer to attach a 1 in. x 2 in. pine board to a 1 in. x 4 in. board. We made a mitered angle cut for the end piece of trim so it can be fitted and attached after hubs installs the built-ins (since the units are delayed, see above).


Luckily, our workshop is located directly under our studio so the air compressor hose could come out the basement door and up through the office window so we could easily attach the ledges and trim around the room. After topping off the nail holes with some wood filler and then sanding, we are ready to move on to painting the walls and the trim work next week! Thanks for reading and following along. If you are also participating in the ORC, leave me a comment so I can follow your project.
SHOP THE POST - WK. 1
(contains some affiliate links)
1” x 4” Trim Board // 1” x 2” Trim Board // Wood Shaker Pegs // Brad Nailer // Plastic Wood Filler // Dremel Tool // Minwax Floor Stain